Monday, August 29, 2011

Failure Analysis: Hurricane Window Defects


Laminated Glass: A glass failure analysis expert witness was engaged to inspect hurricane window defects. These windows were sold to meet the Miami Dade/State of Florida Building Code Requirements for hurricane resistance, and during development of the process, it appears as if these requirements were met. However, the laminating plastic in these windows interacted with the heat and humidity in south Florida. It appears that the laminated windows have a lamination plastic that dissolves and looses adhesion to the glass (please see attached photos). After deterioration these windows are no longer acceptable visually. In addition, it is certain that they will not pass the required code tests.

Labels: , , ,

Wednesday, August 10, 2011

Glass Failure Analysis: Windshield

A failure analysis was performed on a light rail windshield failure. In this there was a pop and the operator was showered with glass. The glass failure analysis expert witness determined that there were two leads to the windshield defogger that were in proximity and because they were improperly wired, arcing occurred between them. The arcing generated heat and pressure that caused the glass to crack and spall locally. Upper left is a photograph of the damaged region of the windshield. Upper right is a closeup of the leads that arced. One can see that the lead ends are melted.

Labels: , , ,

Sunday, January 09, 2011

Failure Analysis of Broken Drinking Glass


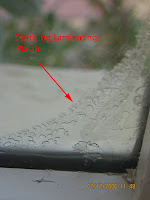
Glass expert performs a failure analysis on a broken drinking glass from a restaurant. As the glass was being filled with cold water, the drinking glass split into two equal halves. The failed drinking glass was made of thick glass, and its rim was tempered. A failure analysis was performed by a glass failure analysis expert, and he discovered that the failure had initiated at a minor damage site on the interior wall of the tumbler. It is hypothesized that the failure was caused by thermal shock. The cold water was poured into a glass recently removed from the dish washer; in this case, the glass had not cooled sufficiently before the interior wall was chilled by the cold water. The cold water rapidly cooled the interior wall and put it into tension. The tensile stresses caused by surface chilling caused the glass to crack. The damage on the interior is believed to have been caused by normal restaurant handling. Tumblers made from thicker glass cool more slowly, and these are more likely to exhibit this type of failure during rush periods in a restaurant. Curiously, this particular glass split perfectly in half.
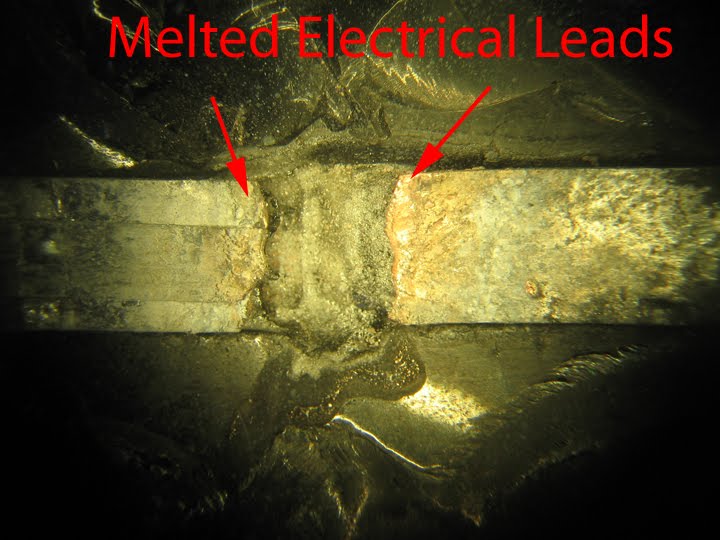
The upper left photograph is an overview of the failed glass. Upper right is a 40X photomicrograph of 1/2 of the failure origin.

Labels: , , , ,

Sunday, December 12, 2010

Glass Expert Performs Beer Bottle Failure Analysis


Glass failure analysis expert witness performs a failure analysis on a broken beer bottle. According to the witness the bottle "explosion" occured as the bottle was being set down. The glass expert examined the failed bottle and the failure analysis showed that the bottle failure resulted from damage to tbe knurl on the bottom of the bottle. The bottle must have hit a hard object when being placed down. The upper left photograph is of the re-assembled bottom of the bottle. The crack comes up from the bottom. Thus the origin is contained in the heel of the bottle. Upper right is a 40X photomicrograph of the portion of the heel containing the failure origin. The failure originated at a chip in the knurl on the bottom of the bottle. This is not a manufacturing defect. It is a result of damage caused by the user.

Labels: , ,

Sunday, October 10, 2010

GLass Expert Discusses Nickel Sulfide Spontaneous Failures


Glass failure analysis expert witness demonstrates that in the case of the spontaneous failure of tempered glass, the tempered glass failure is caused by the NiS particle. The failed glass door was taken apart to reveal the NiS particle. At this point the Wallner lines surrounding the NiS particle were located. The Wallner lines domonstrate that the NiS particle is in the center of the failure origin, and must be the cause of failure. The upper left photograph is a 20X photomicrograph of the NiS particle and its surroundings taken using Nomarski optics. Upper right is the same photomicrograph upon which arrows have been placed to show the crack travel directions as indicated by the Wallner lines. One can see that the NiS particle is at the center of the origin, and is the cause of the failure.


Labels: , , , , ,

Thursday, October 07, 2010

Glass Expert Performs Failure Analysis of Drinking Glass


In order to simulate potential cracking of a heavy bottom drinking glass still hot from a commercial dishwasher, a glass was immersed in 140°F water till stabile. The glass was removed and ice water was then poured into the glass. A glass failure analysis expert witness then performed a failure analysis on the resulting cracked drinking glass. The drinking glass tested is not new; therefore, there is random handling damage present both inside and outside the tumbler. The upper left photo shows the overall cracking resulting from thermal shock. To the right is a photograph of the cracked bottom of the glass. The location of the crack origin is indicated. The crack started in the center of the bottom on the inside surface. When the ice water hit the hot interior bottom, it put the interior surface in tension, and this started the glass cracking. Upper right is a 25X photomicrograph of the crack origin. The failure began at a point where there is a small bruise. It is important to see that there is no major handling damage at this origin. This is because the failure was driven by thermal stresses not mechanical stresses. In addition, the initial part of the crack at the origin is not straight. The direction of the stresses are changing even when the crack is initiating.


Labels: , , , ,

Monday, August 30, 2010

Glass Expert Performs Bottle Failure Analysis


A glass failure expert witness performs a failure analysis on a failed cosmetic bottle. As received, the top of the bottle had broken off. Upper left is a photograph of 'as receceived' failed bottle. Approximately one half of the bottle finish had broken off. Read Consulting performed a glass failure analysis to determine if this failure was a manufacturing defect, or it failed as a result of shipping damage. The upper right photomicrograph is 30X view of the failure origin. The failure initiated at a bruise (small impact damage) on the top of the finish. Three of nine bottles from the same molding cavity also had damage to the top of the finish. In this shipping lot there were over thirty five bottles from other cavities, and none of these showed damage. Thus, the glass failure analysis expert witness believes that this product defect occured during manufacturing. However, both the shipping methods and the manufacturing proceedures will be reviewed for product liability improvement.


Labels: , , , ,

Thursday, August 19, 2010

Glass Fracture Due to Liquid Pressure

Glass failure analysis expert witness performs a failure analysis on a hollow glass tube that failed due to internal pressure. The glass fracture initiated at a small bruise on the outer surface of the glass tube. The upper left 25X photomicrograph gives an overview of the failure. One can see that the glass fracture analysis determined that the failure initiated at a small bruise. The upper right 100X photomicrograph gives more detail of the origin. This was a manufacturing defect because the bruise was created during manufacturing.


Labels: , , , ,

Saturday, August 07, 2010

GLass Expert Discusses Chill Cracks


Glass failure analysis expert witness discusses a common glass bottle manufacturing defect. After the bottle has been formed it is removed hot from the clam shell tool. If it encounters any localized cooling at this stage, it can form a manufacturing defect called a "chill crack". Thermal shock cause the cooled area to shrink, and this causes localized tensile stresses. This event can create a small crack that can cause later failure of the bottle. Above are two photos of the same chill crack. Upper left is a 20X photomicrograph, and upper right is a 40X photomicrograph. To start, this crack is less than 0.1" long, and it has grown to be approximately 0.7" long. The bottling line has had numerous failures from this lot of bottles, and the cause has been traced back to this type of chill crack.

Labels: , , , , ,

Sunday, August 01, 2010

Cosmetic Bottle Failure Analysis

Glass failure analysis expert witness performs failure analysis on a broken small cosmetic bottle. This bottle failure occured when it was being capped on the line. The objective of the analysis was to determine the cause of the failure and to advise the bottle manufacturer. The bottle broke into two pieces, and these are shown in the upper left photograph. Upper right is a 20X photomicrograph of the failure origin. This failure originated as a result of a "chill crack" which is a manufacturing defect formed when, exiting the clam shell tool, the hot bottle touched an unprotected metal tool. The cold spot created a chill crack that eventually caused the bottle failure. The manufacturer is presently correcting the manufacturing problem. In the meantime, only bottles from another supplier are being used.

Labels: , , , ,

Monday, March 01, 2010

Glass Failure Analysis Of Bottle Defect

California Glass Expert Witness was assigned to determine the cause of failure of wine bottles at the manufacturing facility. During processing the bottles had a higher than normal failure rate. A root cause failure analysis was performed by the glass failure analysis expert witness. He inspected a large number of whole bottles and removed those with visible defects. In addition failure analysis was performed on those bottles that failed in manufacturing. Above left is a photomicrograph of a "crush" or "bruise" found on one of the unbroken bottles. This type of defect was found on several bottles. This bottle defect appears to be a result of impact damage. Curiously, there is an open surface bubble (i.e. seed) in the vacinity of the bruise. Upper right is a photomicrograph of the fracture surface of one of the failed bottles. The origin of this failure is at the same location on the bottle as the bruises found on whole bottles. In addition, this failure started at a small diameter bruise. The repetitive nature of the location and the nature of the defect indicates that this manufacturing defect is caused by the glass handling machinery either at the bottle manufacturing facility or at the bottling plant. Also, this damage is severe enough to cause bottle failure.


Labels: , , , , , , , ,

Thursday, February 25, 2010

Manufacturing Defect on Tempered Glass Window


Glass failure analysis expert witness performed a root cause failure analysis on window defects found on a recently built custom home. The upper left photograph shows the defect from the building exterior. The window defect resembles a dust or dirt streak and was not detected until the post construction window cleannig. In all cases, the manufacturing defect is in the center of the window, is parallel to the long side and it looks like a streak or scuff. The upper right photograph is a 200X photomicrograph of a portion of the window defect. It is composed of an array of small glass particles strongly adhered to the glass surface. It is believed that these particles were generated during the window sizing process and were a contaminant on the horizontal rollers used in the glass temper process. During glass tempering they came into contact with the hot glass surface and welded to it. This is a manufacturing defect. It is not a construction defect. This defect is often blamed for window scratching from window cleaning operations. However, these particles were visibly obvious and could not be dislodged. Therefore, these particles don't fit the popular window damage model proposed by many window cleaning experts.

Labels: , , , , , ,

Tuesday, February 16, 2010

Tempered Glass Expert Describes Two Tempered Glass Fracture Surfaces


Glass failure analysis expert witness compares two typical tempered glass fractures. The lower photomicrograph shows a typical thermally tempered glass fracture surface . This piece is from a fully tempered glass sheet. That is; this glass has a surface compression stress of 10,000 psi or more. In addition, the compressive layer on each face is 20% of the thickness. This fracture surface has two sets of Wallner lines separated by mist hackle. The upper photomicrograph shows a representative chemically strengthened glass fracture surface. This one is of a 0.05" thick piece of chemically tempered glass. In this case the compressive layer is approximately 10 microns thick and the compressive stress is approximately the same as thermally tempered glass. The chemically tempered compressive layer is too thin to dominate the fracture. The Wallner lines on this fracture surface are similar to those one would find on the fracture surface of annealed glass.


Labels: , , , ,

Wednesday, February 03, 2010

Failure Analysis of Wood Shipping Crate Failure


Failure analysis expert witness was asked to perform a root cause failure analysis of a wood shipping crate failure. It rolled over and caused a factory worker injury. The wooden crate in question was loaded with 3mm thick sheets of glass. This crate was designed such that there was a four inch lengthwise gap in the floor. The center section consisted of two short spacers. Therefore, when the crate was loaded onto a standard glass shop cart, the center portion of the stack of glass sheets (estimated weight of 1200 pounds) was unsupported and could press down onto the skids and separate the front floor board from the skid. The upper left photograph shows one end of the crate and the support "fork" of the cart. One can also see that the front floor board has pulled away from the skid. The same thing happend on the other end. Here one can see that the "tensile" nails had pulled out. In addition, the "shear" nails were very near the surface and these separated from the floor board without bending. The shear nails do not meet ASTM D36097 which requires these nails to be centered on the floor board. These nails provided no strength to the floor board. This is a manufacturing defect.


Labels: , , , , ,

Saturday, December 26, 2009

Glass Expert Discusses Exploding Tempered Glass


Classic Symetrical Temper Stresses


Three Photomicrographs of

Poor Temper Fracture Patterns


There has been some concern about glass oven wear made from tempered soda lime glass exploding while in use. A Glass failure analysis expert witness performed fractography on a thick glass jar that had been "tempered". Because this is a prototype piece, the temper was not done correctly. When the glass jar surface was abraded prior to thermal shock testing, it exploded violently. Recent tests by this glass expert on properly tempered glass had shown no "explosion". The glass merely cracked in place. Failure analysis of the two types of glass revealed some interesting differences. The non-exploding tempered glass showed symetrical stresses in the glass. The photomicrograph on the top left is representative of the stress pattern for standard tempered glass. In this case, the outer surfaces were under approximately the same compression, and the center of the glass was in tension; this is demonstrated by the "mist hackle" in the center of the fracture surface. Also, there are two sets of symetrical Wallner lines on either side of the center mist hackle. In the case of the exploding glass jar, the temper was found to be non symetrical and not uniform. In some regions the fracture surface had the mist hacklemuch nearer one surface; in addition, one surface does not appear to have been in compression. Other areas on this jar showed weak or very weak surface compressive stresses. The other three photomicrographs demonstrate thiese results. At this point the glass failure expert believes that improperly tempered glass oven ware can "explode". This manufacturing defect may be a product liability and could pose some danger to the user.


Labels: , , , , , , ,

Monday, November 09, 2009

Glass Failure Expert Witness Analyzes Failed Wine Bottle


Glass expert performed a root cause failure analysis of a broken wine bottle. The bottle had broken at the neck into three pieces (Upper left photograph). One piece still contained the cork with the cork screw still in place. In this case the the cork screw was off center and had exited the cork when it was being "screwed" in. The side of the cork screw crushed the interior wall of the bottle neck, and this initiated the failure. The upper right photograph is of the re-assembled top of the bottle. In it one can see the exposed edge of the cork screw and the "crush" defect on the interior of the bottle neck. With this type of cork screw the cork is pried out with a lever force. In this case, this force was sufficient to cause failure and injuryto the person opening the bottle. With this type of cork screw the user must be careful to center it, or he could be injured.
This glass failure analysis showed that the failure was a result of operator error. There was no manufacturing defect.

Labels: , , , , , ,

Thursday, November 05, 2009

Wine Bottle Failure Analysis


Glass Failure Analysis Expert Witness Performs Wine Bottle Failure Analysis. In this product liability case the user was injured as the cork was being extracted. The glass failure expert witness performed a glass failure analysis and determined that the bottle failure initiated at the very top of the bottle. Thus, the cork screw could not have caused the damage that initiated the failure. Unopened bottles from the same case were examined, and it was discovered that the rod that pushed the cork in was very close to the glass in three of the four bottles that were examined. This indicates that the failed bottle was damaged during the corking operation. In addition, the forces used to extract the cork drove the pre-existing crack to failure. The photograph on the upper left is of the failed bottle top. In this photo the origin and crack travel direction are indicated. Upper right is a top down photo of a cork from one of the unopened bottles. The impression made in the cork is from the rod that pushed the compressed cork into the bottle. One can see from the impression that the rod was not centered. This indicates that the subject bottle failed due to corking damage. This is a manufacturing defect.


Labels: , , , , , ,